I was going to get another blog post out on the wild plants and flowers front, however time has been against me this week, so I thought I’d share an experience from January, from my Bushcraft course, when we weren’t in lockdown and I was learning lots. By the way, I didn’t just write this all this evening, it’s from my course log which is 50,000 words long and growing; such a fascinating subject and I’m finding the tuition from The Woodcraft School excellent.
I think it’s fair to say we were all excited, if a little apprehensive, about the January training session down at the Woodcraft School in West Sussex. Not only was it another chance to have a go at the 3 hour bow drill test, something that hadn’t gone too well in the wet conditions to date, it was also our simulated survival weekend. The objective was to recreate a scenario where we were out for a day hike, but something went wrong meaning we were stuck in woodland for 2 nights, or more. This also meant we had minimal kit with us; just enough to deal with emergency situations. Being January it was likely to be cold, and possibly wet, so this wasn’t going to be the same as a pleasant summertime jaunt to a verdant forest full of life. On top of surviving the 2 nights, we also needed to find and purify our own water, something you’d definitely need to do in the event of being stuck somewhere for a while. Given I was likely to get pretty hungry and need a lot energy, I made a huge pile of trail mix to take with me; I may have gone a little excessive on this, having enough to last a couple of weeks, but it tasted so good in the middle of a cold winter’s night.

Trail mix – might have made too much but damned tasty
Given we needed to look after ourselves there were a few key lessons to take on-board, before we were released into the wild. These included learning about what water is used for in the body, symptoms of dehydration and how to fix it, how to source and purify water, as well as how to recognise and deal with hypothermia (too cold) and hyperthermia (to hot), and research into shelter types.
I won’t inflict you with the pages of notes I made on this, however if you’re interested then I’m thinking of a few future blog posts on the subject, so stay tuned.
The brief was to simulate needing to survive after unexpected circumstances forced you to remain in a given location for an extended period of time; in this instance a broad-leaf forest with plenty of water, which was somewhat less challenging, or at least different to, being for example halfway up a mountain in the Alps. I think it’s safe to say we all approached the weekend with a certain amount of trepidation, trying to work out what kit we should take, how we were going to keep warm, and what food was best.

Exploring my woodland block
Given the brief we were only allowed to take a day sack with limited equipment and food, so sleeping bags were right out, as were tents and hammocks and tarps. No sleeping bag, or insulating sleeping mat, in January, oh good. We also needed to be able to source and purify our own water, make fire, build an adequate shelter, and cook basic food.
All the knowledge and skills we’d learned to date would come into play over the course of the weekend, so it was a good opportunity to put everything into practice, and grow in confidence in the outdoors. I hope to be able to lead groups in the wild in future, and this was definitely a stepping stone on that journey.
The aim was to be able to thrive and not just survive, and I like to think that by the end of the weekend, and after lots of learnings, I was getting there; just a shame I sat on the spoon I was carving.
What to take?
With a maximum capacity of 20 to 30 litres we were limited on what we could take. I opted to use an army surplus day/patrol pack to carry everything I needed, which was pretty full by the time I’d finished packing. I must have unpacked and repacked that bag a dozen times whilst deciding what to take, and probably still took too much kit, however if the weather conditions had been different, for example including rain or snow, I’d have perhaps needed the extra change of clothes and waterproof trousers.
Below is a brief summary of what I took with me
- Army surplus patrol pack – about 30L
- Outdoor trousers (tough) and clothing, plus spare set of clothing in dry sack, mutiple layers and dry socks , hat, buff, shemagh, hat
- Waterproof jacket – Craghoppers; I’d have preferred ventile cotton or thick wool with ventile patches, which would be spark resistant, but will need to save up for that
- Bushcraft knife and laplander saw
- Paracord, sling and carabiner
- Fire making kit including some tinder
- Water bottle x 2 and collapsible water vessels x 2, Millbank bag (brown bag – expedition sized), puritabs (not used)
- Life venture screw capped lid cup, which almost keeps your brew too hot
- Zebra billy can, spork, cloth
- Headtorch
- First Aid Kit – only cut myself once, toothbrush
- Food: Pasta and pesto sauce, chocolate, smoked sausage, dried apricots, trail mix – far too much trail mix as it happens, but you never know when you might have guests, couple of apples, tabasco sauce (always goes with me on cycle tours), cereal bars, dried oats and honey
- Brew kit – herbal teas
- Rab down jacket – in compression sack
- Poncho (US army) – I could probably have done without this, but would have been invaluable if it’d rained
- Emergency foil blanket (space blanket)
- Toilet roll and hand sanitiser (gel)
- Mobile phone and battery pack, notebook and pen
Getting started
To simulate a survival situation we were all dropped off, individually, into our own block of woods away from our usual camping area. After a morning of being together with the group I was suddenly alone amongst chestnut and birch trees, with just the sound of birds for company; followed shortly by Sib shouting hello from about 100 metres away, breaking my wilderness reverie.
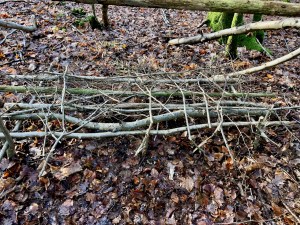
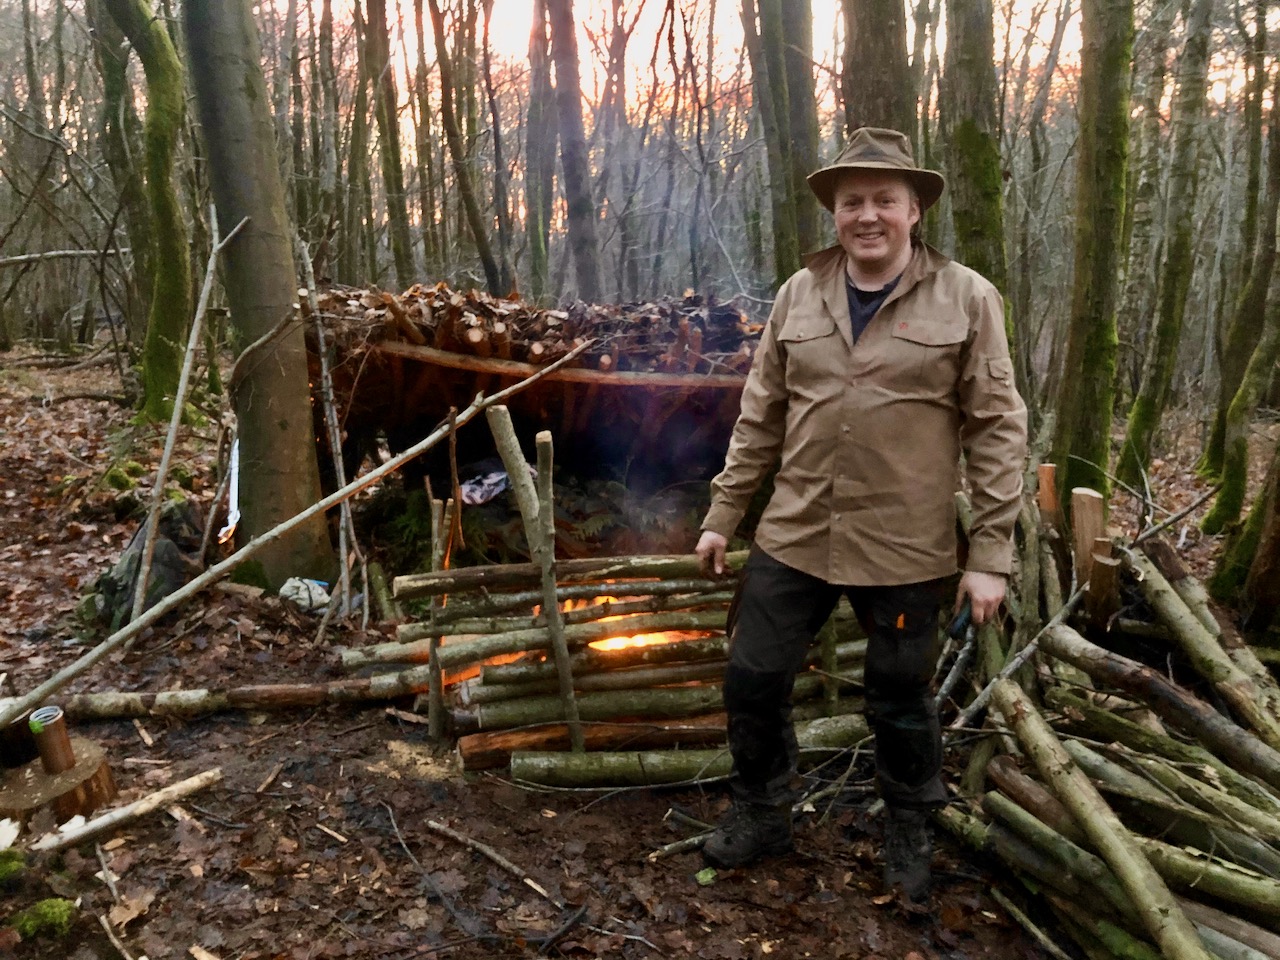
With several hours of daylight left, and enough drinking water to last me for a bit, my priority was to get a shelter built and gather fire wood; it was going to be a cold night with temperatures forecast to drop below freezing. The area of woods I was in had plenty of standing deadwood to use, in the form of Sweet Chestnut and some Silver Birch, so I set about cutting some down using my laplander, to create both firewood and material to build my shelter from.
Whilst a laplander saw is efficient and easy to carry, I did start to miss using a bow saw after about an hour of processing wood! I guess one wouldn’t usually take a bow saw on a day hike though. I soon had the basis of a shelter built, trying to position the opening away from the prevailing wind. I used forked pieces of wood up against trunks for the two side pieces, with a cross bar running between them. I also pegged the side poles at the end to stop them from slipping backwards. I chose a spot that had a bit of natural shelter due to the lay of the land, with sufficient trees to use for support, and no low overhanging live branches that would get singed by my fire. I was also mindful to remove any dangerous looking standing deadwood from the immediate vicinity lest it fall on me if it got windy.
-

- Spot chosen – getting started on shelter
-
- Building my bed
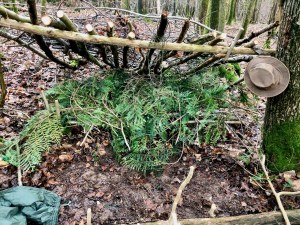
Before building too much of the shelter I decided to build a raised bed, as it’s easier to do that without a roof being present. I constructed the raised bed using forked pieces of wood pushed into the ground, with poles running between the forks to make a platform about a foot off the ground. I needed some greenwood for this so coppiced some Hazel from a nearby ride edge, bringing it back to my camp. As well as making the forks and some of the poles, I also made a mallet and a couple of wedges for splitting wood, and used the brash to create a springy base-layer for my bed.
On reflection I think it might have been easier to use some bigger logs to lay the poles upon for my bed, rather than use forks of Hazel, although it did add to the springiness. I did consider making a V shaped bed, as I often sleep on my side; the V shape of the base creates a comfortable shape to sleep in. However this would have lost be valuable ground clearance and not allowed hot air from my fire to circulate under the bed. It’s nice to have a raised area to sit on next to the fire rather than the ground; a good whittling spot that avoids a wet posterior is essential!
-

- Shelter getting there
-

- Shelter plus building long log fire
Using the Hazel I also created a Whagon Stick pot hanger, which proved invaluable over the course of the weekend for boiling water and heating food; I was really chuffed with how well it worked.
With bed frame done I got to work finishing my shelter, or at least finishing it as much as I could on day 1. I covered the lean-to roof with more poles, using deadwood, and also wove in some more Hazel brash to create a layer leaves wouldn’t fall through; I needed to pile on about a foot of leaves to act as insulation.
I took a break mid-afternoon to go and source some water, and whilst on my wanderings decided to collect some Western Red Cedar boughs to make a better mattress for my bed. The boughs act as good insulation, especially when woven together so the ends don’t prod you during the night, and they smell nice, which I reckon leads to sweeter dreams.
-
- Important to have a place to hang your hat
-
- Lighting my fire – start with V shape
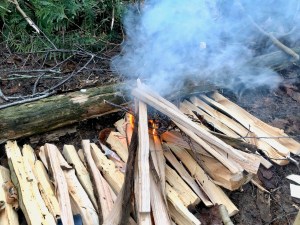
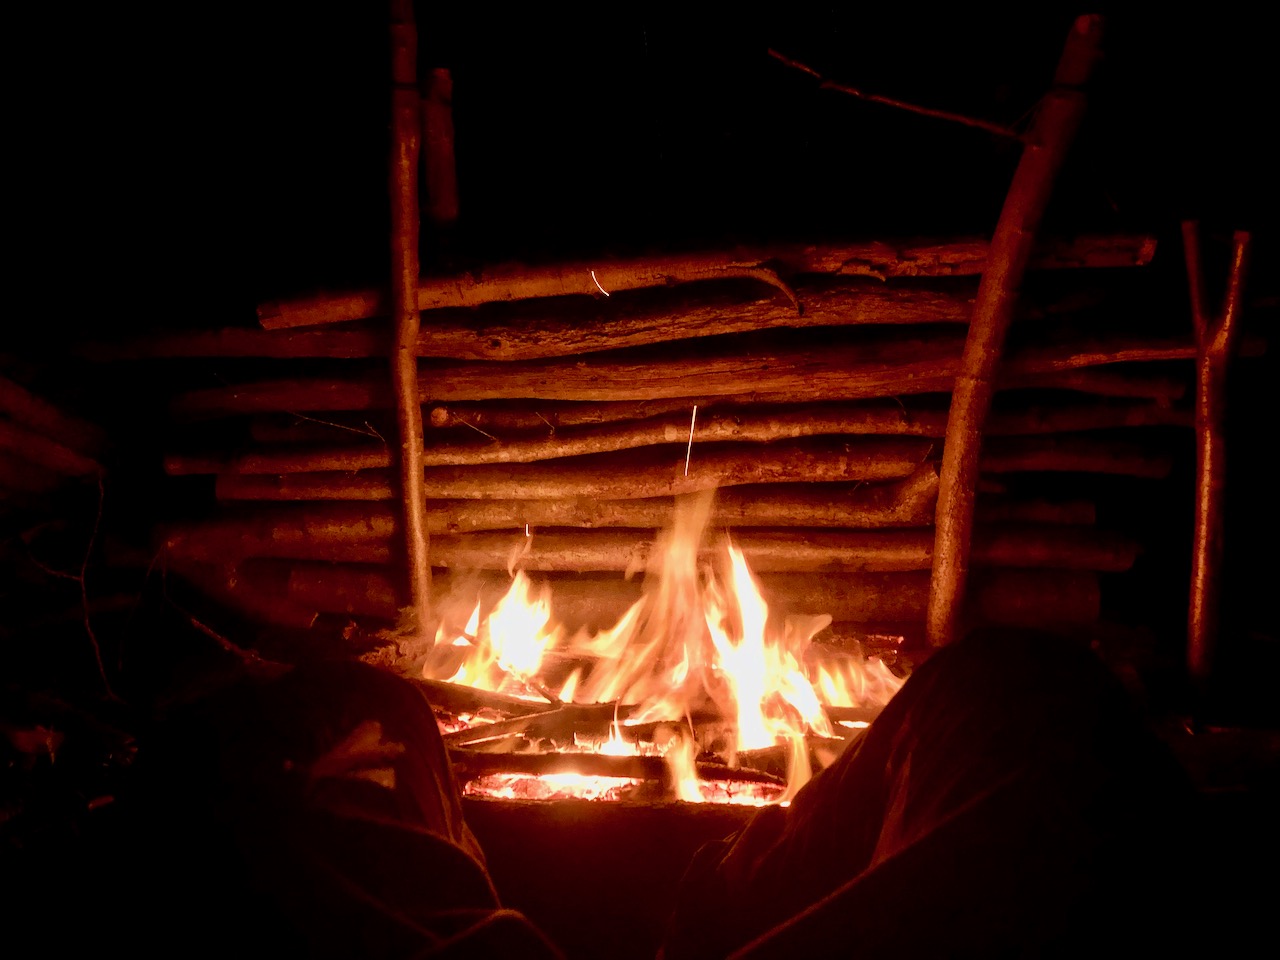
With dusk approaching and plenty of firewood prepared I also though it prudent to get a fire going. I made a base from split chestnut, behind the beginnings of a reflector, and created a V-fire using a few feather sticks I’d prepared earlier and some silver birch bark. I initially positioned the fire about 3 feet from my bed, however by the second night it was considerably closer.
Finding and purifying water
I must admit finding water wasn’t too much of a challenge. It had been raining so much over the previous few months the water table was very high, and I didn’t have far to walk to find a spring. The water from the spring was very clear already, having filtered through sandy soil, however I thought I’d better pass it through my millbank bag to be on the safe side. I hung my millbank bag from the sling and carabiner I’d brought with me; I often carry a sling and carabiner or two with me as they’re useful for so many things, a habit from my more frequent climbing days.
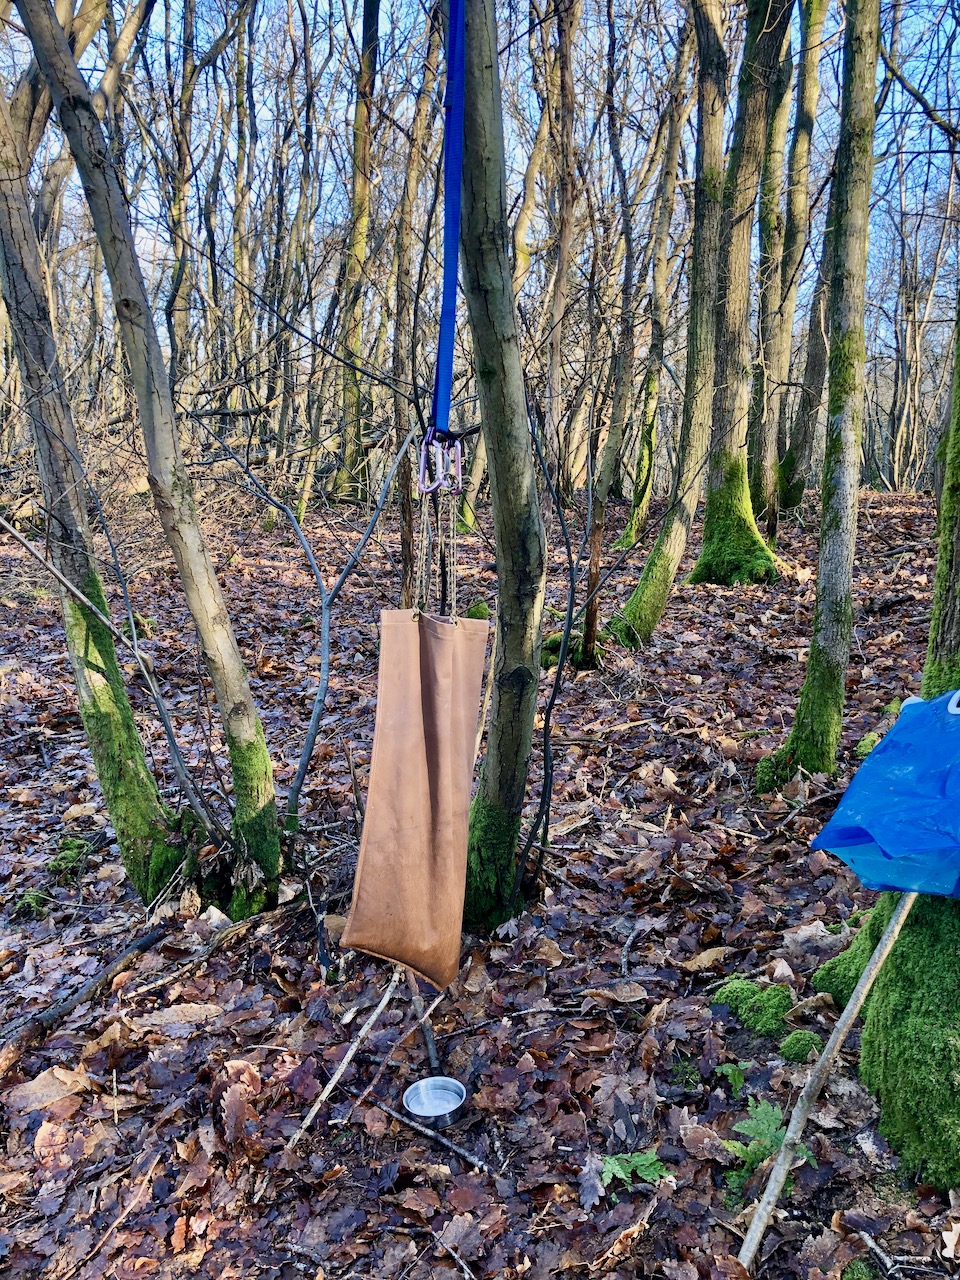
Millbank bag and sling set up for filtering water
Interestingly I did follow the spring up the hill to see if I could find its source, or a better place to collect water from easily, and came upon what looked like old style septic tanks, or the settling tanks anyway, behind a house backing on to the woods. They were however several hundred metres uphill from the spring where I took my water from, so I figured the ground would have done most of the work for me by filtering out any nasties etc.
My millbank bag has a fairly slow flow rate, despite having run it through a rinse cycle in my washing machine at home a few times, however by constantly topping it up and collecting water in the small pan from my zebra billy can kit, I was able to collect a large amount of filtered water in one of my collapsible water vessels; I used the other one to collect unfiltered water. I remembered to let a decent amount of water run through the bag, down to the line, before I started to collect it, to make sure I was only getting filtered water and not drips off the outside.
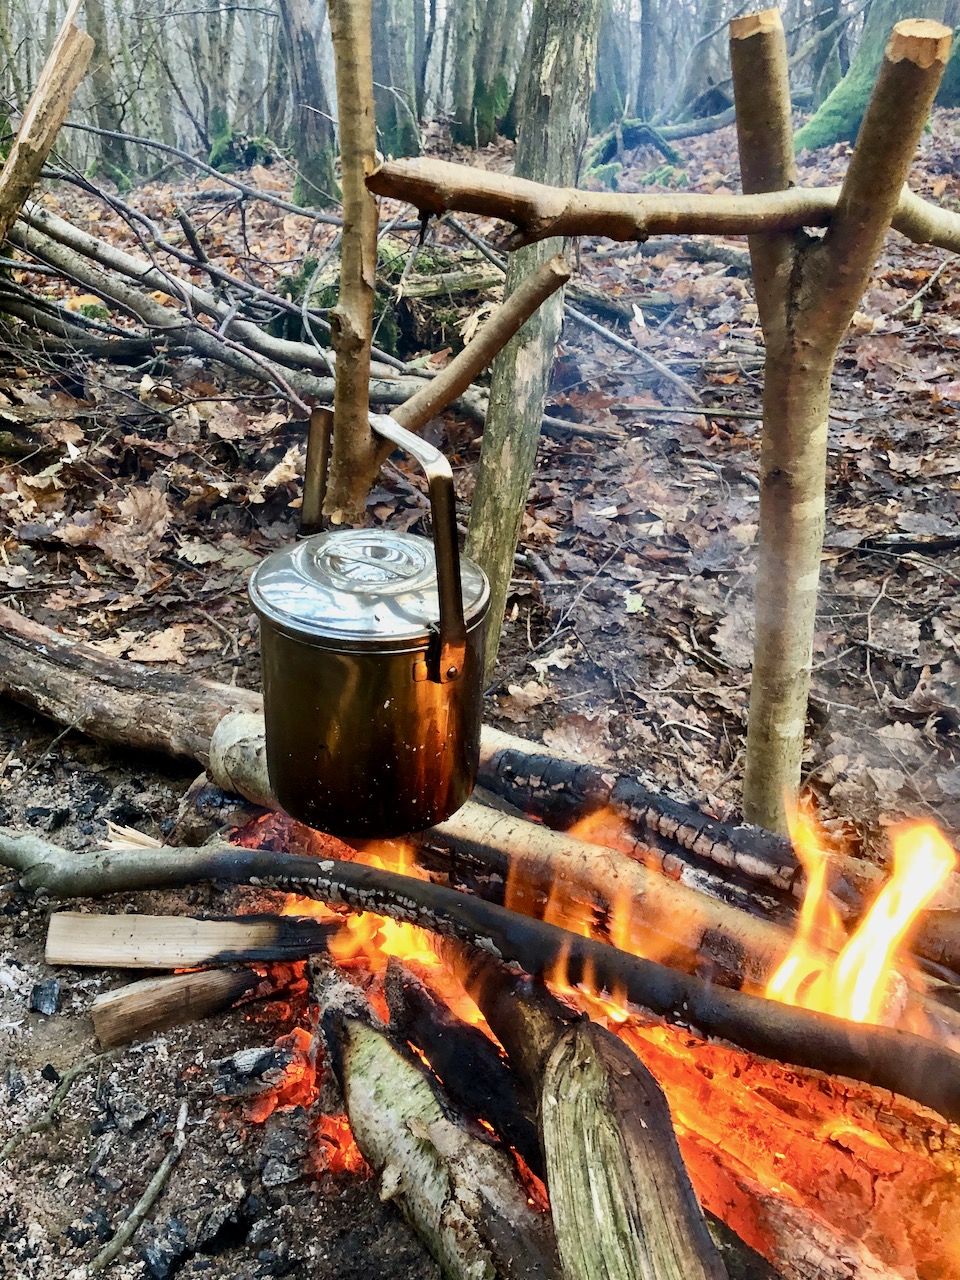
Billy can and Whagon stick – water purification in progress
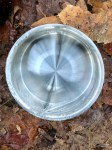
It was then just a matter of boiling water over my fire, using the zebra can and pot hanger, and either drinking it straight away as tea, or storing it in a water bottle. I’m pleased to say my system meant I had more that enough clean water throughout the weekend, including enough to wash the essentials with – face, pits and bits; warm water of course.
The First Night
As night fell the temperature dropped, and I hastily made some last adjustments to my shelter, piling more leaves on top as insulation. I reckoned I had enough firewood to see me through the night, intending to widen my fire into a long log fire to provide sufficient warmth. I hadn’t had time to build a large reflector yet, but was warm enough once I put on my down jacket as an additional layer, and lay down on my raised bed.
-
- Long log fire lit
-

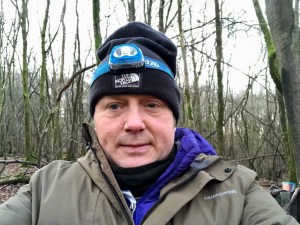
- Me at dusk
But I’m getting ahead of myself. It was pretty much dark by 17.00, but that was far too early to go to bed, despite which I’d have needed more firewood if I intended to keep a long log fire going from then all the way through to the morning. I had my head torch so kept busy processing a bit more firewood from the dead chestnut and silver birch I’d felled earlier, starting to make some sides for my shelter, and then cooking some food a bit later on; pasta with pesto and a bit of smoked sausage, with tabasco sauce to spice things up a little, and plenty of tea.
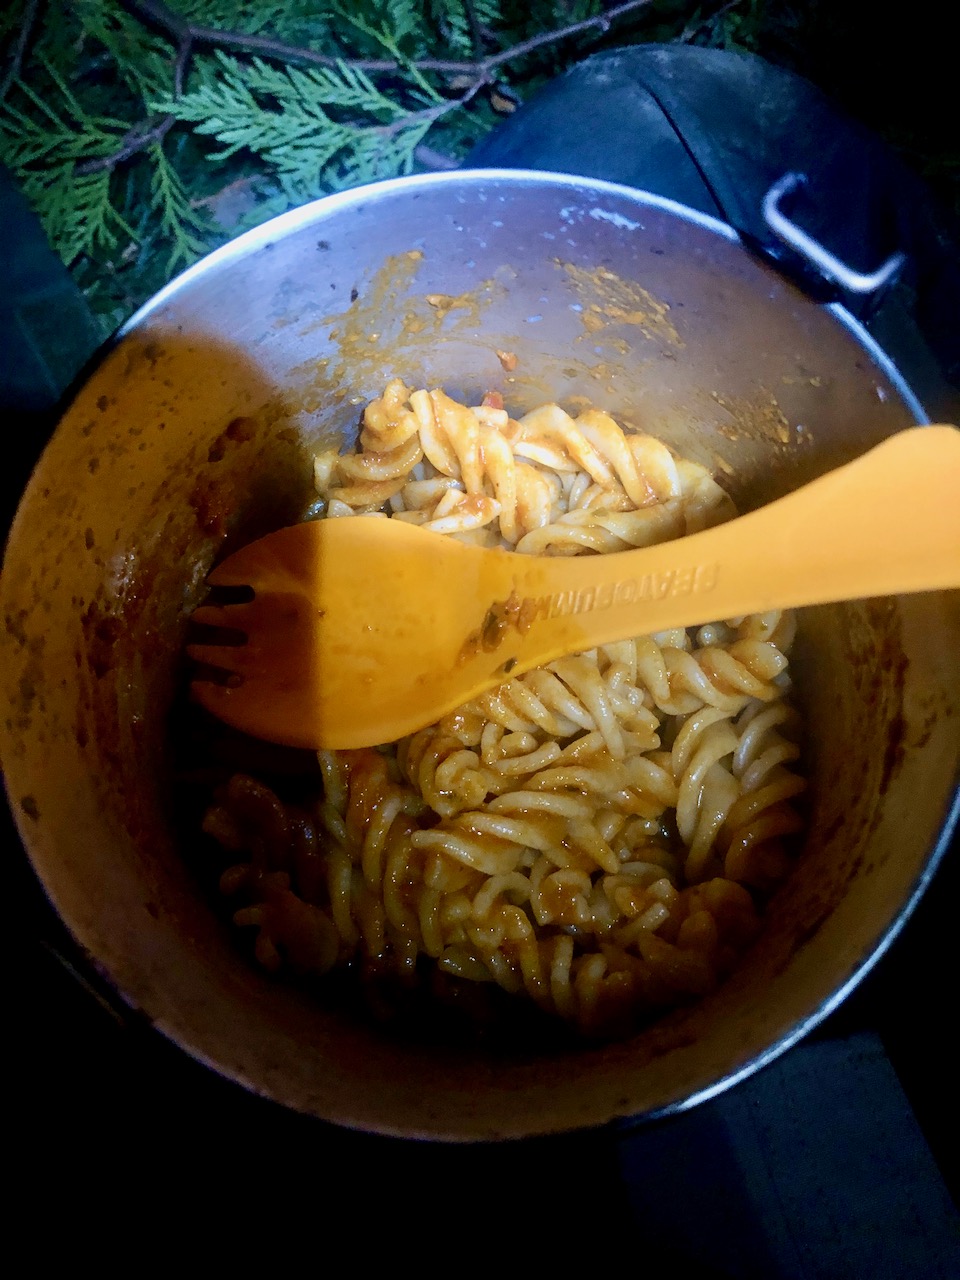
Pasta and pesto, with spork
I widened my fire into a long long fire before finally turning in, making sure I had plenty of wood within easy reach to add throughout the night. This included more kindling to get the fire going easily should it go out. I was comfy lying on my bed, electing to keep my shoes on as my feet were mostly warm in my boots. I used my poncho as a bit of a blanket but it didn’t work very well, as moisture built up underneath it. With the fire and shelter I was mostly warm enough.
-
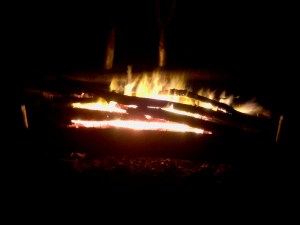
- Long log fire burning merrily
-

- Long log fire – essential when close to freezing
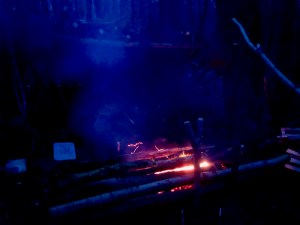
I was a little nervous about the fire either going out if I fell asleep too deeply (I can sleep fairly deeply anywhere), or if it sparked and set fire to my shelter or firewood pile; I was burning mostly seasoned chestnut which spits enthusiastically. As a precaution I pegged a large log between me and the fire. As I had plenty of water I boiled a last lot before my first sleep cycle and transferred it to one of my water bottles. I placed this between my thighs to warm the blood in my femoral arteries, which proved a great way of staying warmer for a couple of hours. Had it been colder it would have also meant I’d have had non frozen water in the morning.
-

- Final water boil of the night
-

- Watching the sparks – meditation
It was very peaceful lying in the woods, listening to the owls and gazing up at the stars. After a busy day of non-stop preparation it was great just to stop and switch off for a bit, with a full stomach and a little bit of chocolate as dessert. I considered how privileged I was to be in such a beautiful woodland, sleeping next to a fire in a similar manner to that my ancestors must have done for thousands of years.
I probably initially went to sleep about 22.00, for a couple of hours, then woke up and loaded more wood on to the fire. I then slept again in 1 to 2 hour intervals throughout the night, waking to add more firewood, or nip to the loo because I’d drunk too much tea; it was much colder away from my fire!
Day two – Camp improvements and Learnings
I awoke about 06.30 hours with my fire still glowing, and the woods just about starting to get lighter. I lay still for another 30 minutes, despite realising my feet were now pretty chilly and I needed the loo; my bed was pretty comfy and I was enjoying the dawn chorus.
-

- Shelter post night 1
-
- Me – a bit blurry eyed
Eventually the need for a hot drink, breakfast, and to warm my feet up with some activity got me out of bed, up and moving. I was feeling pretty happy about having made it through the first night without too much difficulty, and for having had just about enough firewood. I decided I needed more for tonight though, as it was likely to get a bit colder, and I could have burned more if I’d wanted warmer feet. As I was getting up a roe deer passed through the woods not far from my camp, disappearing up the hill; he or she didn’t seem too alarmed at my presence.
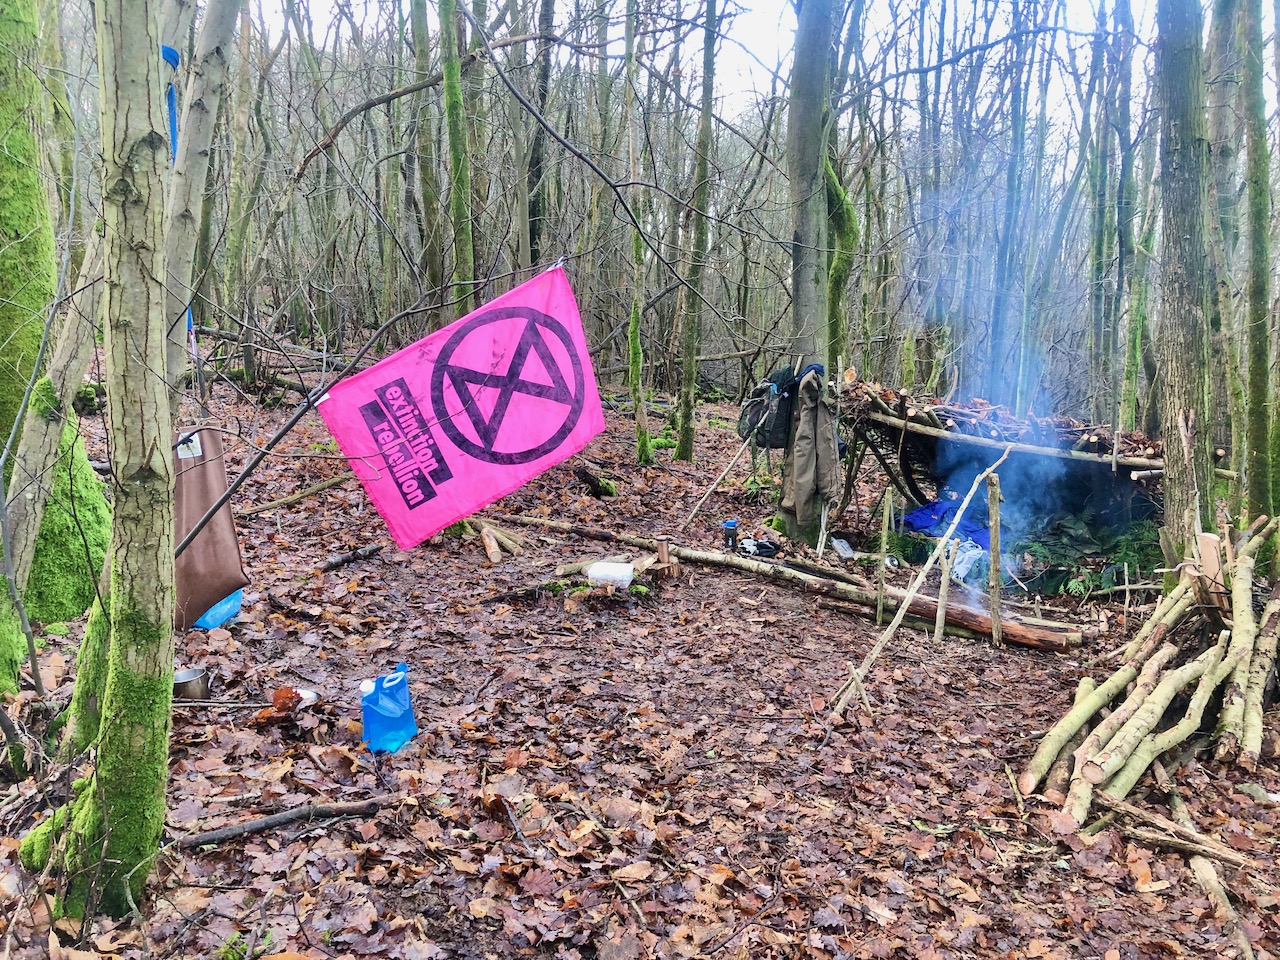
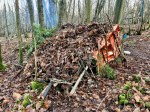
Camp complete with XR flag
We were due to meet up as a group about 11.30, so I spent the morning preparing more firewood and water, as well as putting proper sides on my shelter. I’d forgotten about my space blanket so used that for one side, and started to weave a wall of hazel together on the other.
It was good to meet up with the rest of the group to see how they were doing, and encouraging to learn everyone had made it through the night without having to retreat to tents and sleeping bags. I think we were all fortunate that it hadn’t rained, which would have made things trickier, and meant I’d probably have needed more leaf litter on my roof or to incorporate the poncho. As well as a walk through the woods to learn some winter twig identification, we had a bit of a debrief on what we could do to improve our shelters and well-being. Some points below to remember:
- For a long log fire make a big base out of logs to raise it off the ground. This creates a good long lasting bed of embers, and will initially protect any tree roots.
- Make sure you have an adequate supply of feather sticks and kindling to get your fire going again if you need to; you don’t want to have to spend an hour doing it during the night when you’re cold and sleepy
- Create ‘fire piles’ of wood to manage your long log fire through the night. You can easily pick these up and use the set to get your fire going again for your next sleep cycle. You should be able to sleep well for 3 hours before needing to redo your fire, although it may initially be a little hot to be close to
- Think big on the fire, and adequately long to give your whole body warmth. And always get more firewood than you think you’re going to need; in general I think I was okay on this score
- Close the ends of your shelter to stop drafts and trap hot air from the fire
- Raise your bed so hot air can flow underneath it, and to give you a sit spot
- Put a greenwood ‘banksmen’ (large log) in front of your fire to stop it rolling into your bed, and move your fire closer to your bed for warmth; people have died because they were just a couple of metres away from the warm zone of their fire
- Use a reflector to reflect/radiate heat back into your shelter. You can just use logs for this, or incorporate a space blanket
- Loosen you boots to keep your feet warmer. This traps a layer of air around your toes as heat; top tip and helped me the following night
- Lean to shelters need to have a 45 degree angle, and not be too far off the ground
- Orientate your shelter to the prevailing wind, and to take advantage of the sun rise
- Remember hygiene – wash hands etc
- Lip salve and hand moisturiser really are a boon to stop skin cracking; I’d remembered the lip salve
- Rotate your sleep and activity through 3 hour blocks
- Recognise what is wrong and act on it
- Thrive not survive
I’d covered off several of the above points already, however once lessons were over I was keen to get back and perform some more enhancements to my shelter, whilst we still had some daylight. I built up the reflector for my long log fire using greenwood, and made sure it was secure by tying the staked poles together at their tops. I also set a large greenwood banksmen in front of my bed, moving the fire a little closer. I harvested a little more Western Red Cedar for my bed, and finished the sides of my shelter to shut out breezes. I also added some more leaf litter and trimmed down some of my shelter poles to stop them poking through it; prevents water running down them if it rains. By the time it was starting to get dark I was pretty happy with my set up for the night, although I could have kept on enhancing and adding features for days!
Me and my camp
The Second Night
I had more firewood prepared than the previous evening, and wanted to try for a bigger fire throughout the night as it felt like it was going to be colder. This worked well however at one point my reflector did catch fire, and I had to hastily insert a new banksmen between it and the main blaze. I again feasted on pasta, pesto and smoked sausage, and munched my way through large quantities of trail mix.
Long log fire with reflector
It was definitely a colder night so I was glad of the bigger fire, although I did find it got a bit smokey at times, perhaps because some of the wood was a little damp, but also because the wind had slightly changed direction. I think I need to mix up my firewood a bit more in future, and try and use some oak or ash as well as chestnut and birch. The former burn long and hot, the latter bright and more briefly.
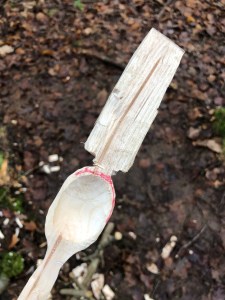
As I’d got most things done I settled down to try whittling a spoon for an hour or two, before my first sleep cycle. I also made a few extra hooks for my shelter, and an upright fork to put at the front to support the cross beam, which had more weight on it now.
I slept fairly well again on night two, and was definitely warmer with the improvements I’d made to the shelter; this was fortunate as it was definitely colder. I don’t think I managed a three hour chunk of sleep, but I got close, and my fire stayed alight throughout with regular restocking. I had plenty of wood left in the morning to get some breakfast going, and awoke feeling fairly refreshed to the sunrise and a beautiful dawn chorus.
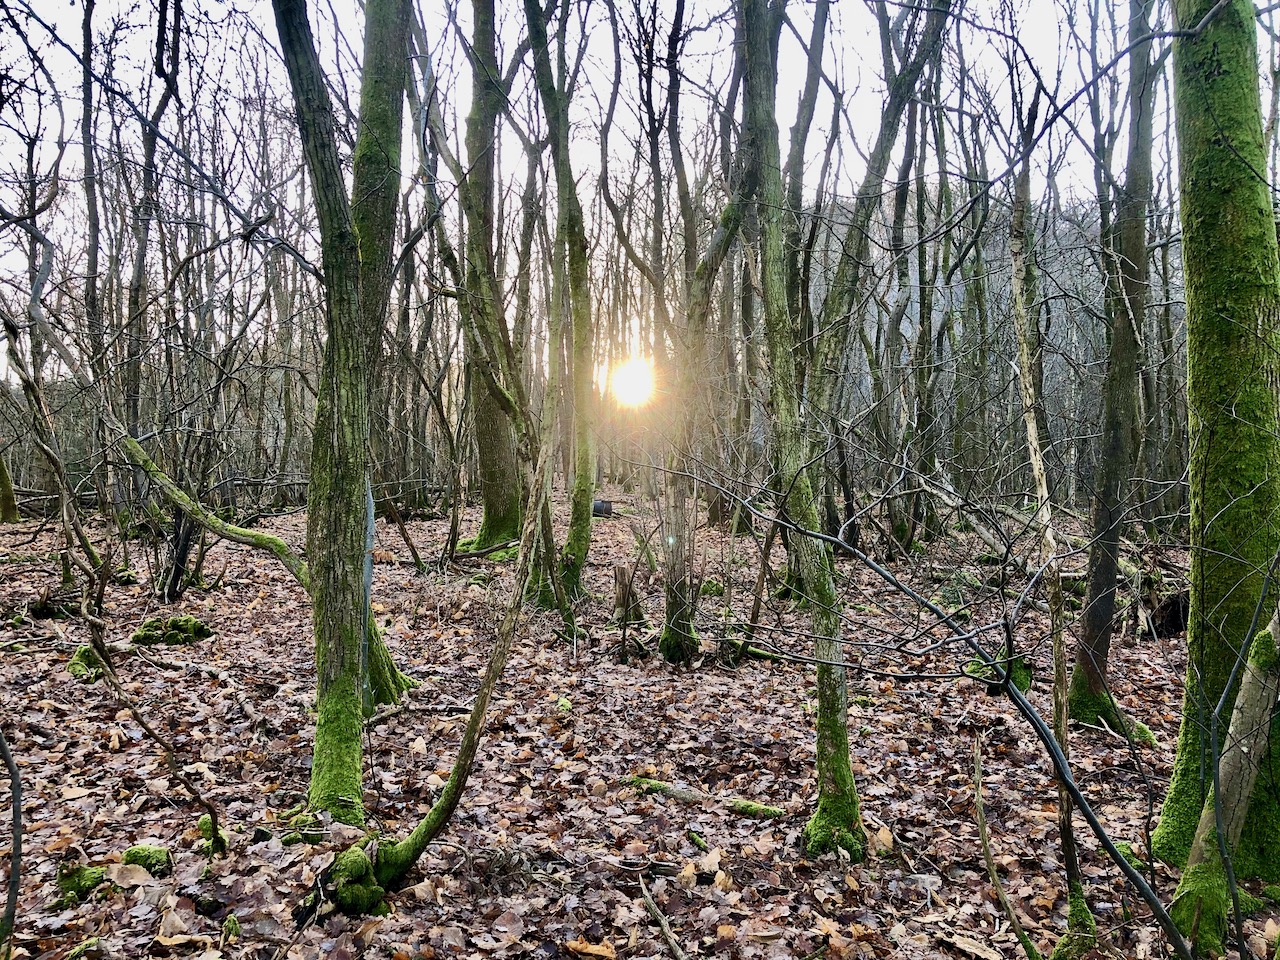
Wintry sunrise – glorious sights, sounds and smells
We made it!
I should mention toilet facilities for the weekend. Going for a wee isn’t really an issue, as long as you go far enough away from a water source; 100 metres or so. For number two’s it was a case of finding somewhere discrete and out of the way, digging a shallow hole, and using that. You don’t want to dig too deep as there won’t be organisms present to break down the faeces, but equally you don’t want anything too shallow that will leave a nasty surprise for someone; a ‘poo mine’. Toilet paper should be burned.

Listening to the birds sing
I’d made it through two nights in the woods without a sleeping bag, and was feeling hale and healthy. My shelter had worked and I’d learned more practical ways to thrive and not just survive. I got some water boiling for tea, and had a a quick wander to stretch my legs, noticing ice on the surface of my water collecting pan; must have been a chilly night away from the fire.
-
- Wander up the hill – frost abounds
-

- Morning brew
-
- Icy water in the morning
We had a few hours in the morning prior to the next dreaded bow drill test attempt, to relax and spend time at our camps. It was hard not to keep tinkering with improvements and thoughts on how to expand, or to start processing more firewood! I did a bit more spoon carving to pass the time.
-
- Spoon carving in progress
-
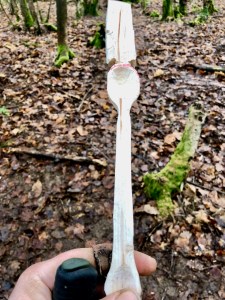
- Spoon carving, getting there
Below are a few final pictures from my camp. Looking at them I could have added more leaf litter to the bottom end of my lean-to, and filled in some gaps, but I’m pleased with out it served me through the weekend.
-
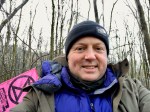
- Me on day 3 – hat not very straight
-
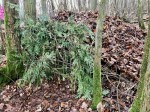
- Side of shelter with Western Red Cedar weaving
-
- Side of shelter with space blanket incorporated
-

- Camp with flag
Before leaving I removed any man made items from my shelter, including my bright Extinction Rebellion flag which had made it very easy to see where my camp was from a distance, and any artificial cordage (paracord); I’d used a couple of withies in other places. I made sure my fire was well and truly out, using my left over water, and packed my bags; I still had lots of trail mix left, and at the time of writing this it’s still going! All natural materials will be turned into habitat piles upon our next visit to the site in February. I’ll be interested to see how my shelter has faired in the meantime, and perhaps tempted for a quick snooze.
Oh, and I accidentally sat on my spoon, d’oh.